SHTFPreparedness may collect a share of sales or other compensation from the links on this page.
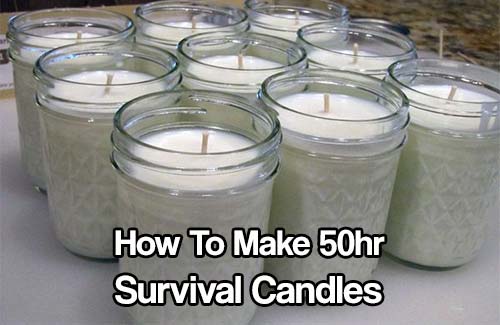
If SHTF, DIY emergency candles will be one of the best things you can stock up on. Candles are cheap but do not last that long. This homemade recipe makes as many candles as you want and if used in the mason jars mentioned can last up to 50hrs, some even say 70+ hrs.

If you’re feeling stressed about making DIY candles, don’t worry. We’re going to show you a recipe that is so easy a child could do it! Of course, don’t allow a child to do it alone since you’re dealing with hot wax.
Candles are an invaluable source of emergency lighting in the event that your electricity goes out. If you’re in a survival situation, you can depend on those stocked up candles to give you light when you need it. While regular candles don’t burn for very long, you can make candles that will burn for longer.
These survival candles are built that way intentionally. They are made to burn for at least 50 hours. In some cases, they may burn for as long as 75 hours or more!
That’s a lot of burn time from one jar candle, which will be invaluable to you when SHTF and you need light. The other benefit to these survival candles is that they are cheap to make and they store for years so you will always have them when you need them.
Read on to see how to make these awesome survival candles. You can make a bunch now as a weekend project and save them up for an emergency. You can even give them away as gifts!
DIY Emergency Candles
A DIY emergency candle is going to give you high-quality lighting in any emergency situation. You can learn how to make candles from scratch now and then keep them on hand for any emergency. You may use one or two now if the power goes out and you’ll be so thankful you have them.
But what if there is a bigger emergency or natural disaster? DIY survival candles will absolutely save the day by giving you just what you need when and where you need it.
50 hour DIY emergency candles will ensure you have emergency light when you need it. It also feels really great to make something like this for yourself. It’s a great way to be self-sufficient.
How to Make Candles from Scratch
Once you learn how to make candles from scratch, you will be able to make them any time you choose. You can get the whole family in on it and have a candle-making party yourself at home. Then stock up all the candles for an emergency situation.
The supplies are easy to get and don’t cost a lot of money and the candles themselves are not difficult to make. Don’t feel intimidated by the DIY candles because we’re going to show you exactly how to do it.
Materials:
Soy Wax Flakes
You can get soy wax flakes online or from craft stores. They are often used in scented candles and you can get a big bag shipped right to you and it’s easy and affordable. About 1 pound of wax will fit around a 24-ounce container.
Wicks and Tabs
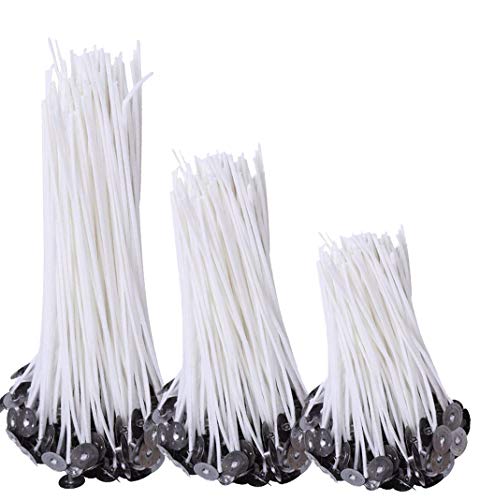
You can also find these on Amazon and at local craft stores. You can get pre-cut wicks or wick you cut yourself. You want your wicks to come a bit longer than your candle is tall, so base it on the jars you are using.
Mason Jars
Now you can also use canning jars (mason jars) for creating your own candles. I like to save jars from jams, jellies and other things they use in their home to reuse as candles. Then, you don’t even have to buy them new.
However, if you don’t have any to spare, you can find them online easily. If you are looking for 40-50 hours, then you want to target 8-ounce mason jars. If you want more burn time, then get larger mason jars. But, don’t get them too large as the wicks won’t fit.
Conversely, if you need a greater number of candles, go with the 4-ounce mason jars. Of course, it goes without saying these will have shorter burn times.
Hearts and Crafts Soy Candle Wax and Wicks for Candle Making, All-Natural – 10lb Bag with 100ct 6” Pre-Waxed Candle Wicks, 2 Centering Device Ball 40801 Golden Harvest Mason Regular Mouth 8oz Jelly Jar 12PK ‘Vintage Fruit Design’, RM 8 Oz Clear
 150pcs Natural Candle Wicks
50pcs 8 Ball 4-Ounce Quilted Crystal Jelly Jars with Lids and Bands, Set of 12-2 Pack (Total 24 Jars)
Tools:
Scissors
To cut the wicks; any scissors will do.
Pouring Device
I like a Pyrex measuring cup, but you can use anything with a pour spout.
Double Boiler
You need this to melt down the wax. If you don’t have a double boiler, you can use a pot inside another pot.
Gloves for Protection
This is added protection since you’re using boiling water and hot wax.
Instructions
Now that you have everything you need, it’s time to learn how to make your candles. Remember, we said it was easy so don’t worry!
The first step, before you start to melt anything down, is to get your wicks ready. You will cut the wicks to size and then put them into the tabs. If you buy pre-tabbed wicks, then you can skip over this step.
Then you can load your wicks into your jars. It’s okay if they are not perfectly centered in the middle of the jar. It will probably get moved around when you pour the wax in.
Once the jars are set up with the wicks inside, it’s time to melt down your wax. Use your double boiler (or makeshift one), and melt down the soy flakes. Note that you can get centering devices, as with the ‘Hearts and Crafts’ candle-making kit above. Once fully melted, it will be a liquid.
The flakes may change from white in color to a yellow-looking liquid. This is normal – so don’t worry. Now gently use your pouring device to pour the hot wax into the jars.
Be careful not to fill all the way to the top of the jars. You’ll need to leave a little extra space at the top.
This will be your chance to move the wicks and center them into the middle of the jars. You can do this before the wax cools and sets.
Once the wax cools and sets, you can trim the wicks on the top. You want them to be about 1/4 an inch above the wax. Now you can screw on your lids and store them until you need them!
Best DIY Emergency Candles
If you want the best DIY emergency candles, you should make them with soy. While you can make them with other materials, soy is great because it is long-burning. In an emergency situation, you want to go with something that is long burning.
If you’re looking to just buy the longest burning candle ever, there are 115+ hour emergency candles available. If you want to make your own to match these long-burning DIY emergency candles, then you can use a bigger wax container and a longer wick.
This ensures you get even more burning time from each candle. Although some people just prefer to make extra smaller or medium-sized candles instead of a lot of really large candles. It’s all about your personal preference.
Now that you know how to make long-burning emergency candles, you are set to start making and prepping for an emergency.


