So a long weekend is coming up, and the air is crisp and the leaves are brilliant. Anytime you camp out far from civilization and roads, you can run into a situation, that’s part of the fun.
Here are some survival shelter ideas that you may want to be tucked into your head and a few pieces of equipment that you may want to be tucked into your backpack, just in case.
A lightweight survival shelter can be an essential piece of safety equipment to take along when you venture outdoors. They can provide a warm, dry, microclimate to protect you from extreme cold, wind, or rain.
They can provide shade in hot weather and a base where you can store water, food, and other essential equipment. Some survival shelters can help you hide from animals, provide a resting spot, or even a place to sleep. Practice making one before you need it.
9 Survival Shelter Ideas
Next time you are camping, hone your skills, stretch your knowledge, and plan to erect a survival shelter. Your camping buddies may kid you about it, but if you or they ever need to actually build one, the knowledge may someday save a life.
You can always go back to your favorite four-man tent and down sleeping bags.
1. Natural Shelters

Caves, rocky overhangs, thick stands of evergreen trees, large rocks on the leeward side of hills—even a hollowed-out tree can serve as a natural shelter. The site needs to be dry, out of the wind, and dripping water.
Many natural shelters can also harbor animals so be cautious before entering any cave or hollow log, you may find yourself with insects or other smaller critters. Don’t stick your hand in a hollow log, use a stick to check out that there are no snakes inside.
If you are lost in the woods and need a dry, safe place for shelter, a fallen tree trunk can be perfect if it is hollow. During the day, it is easier to build a shelter.
During the night, you may be battling against squirrels and rodents who are vying for the same shelter you.
During the day, using a cave overhang may be a good temporary shelter but if bigger animals live there, you may have unwanted company that could really be dangerous during the night.
2. Canadian Quinzhee

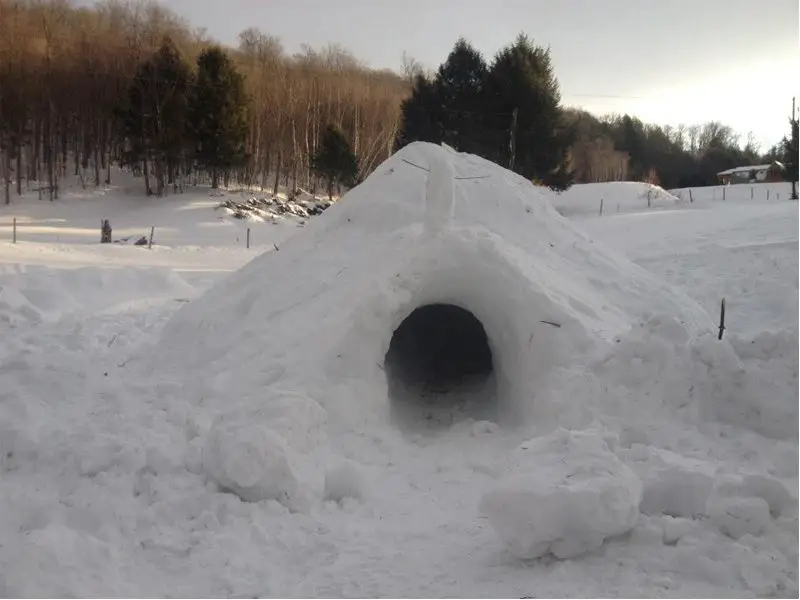
Snow provides insulation, and it is a lot easier to build a quinzee than an igloo. A quinzhee is a dome-shaped snow shelter. It comes from Canada and is of Athabascan origin. It is pronounced kwin-zee.
Snow needs to be just right to cut it into blocks for an Igloo, but with a quinzhee, most any snow will work except hard-packed snow. While temperatures outside can plunge into the teens, inside a quinzhee can be as warm as 30 degrees F.
Start by tramping down your floor to pack down the interior. This provides a strong platform to build. Pile up a gear under a tarp. Backpacks work well for this. Then pile snow on top of the tarp. Pack the snow down.
You will need it to be about 2 feet thick all around. Let the mound set up. You need to wait at least 90 minutes before hollowing it out. This waiting step is crucial and lets the snow “sinter.”.
The action of piling up snow helps the snow crystals bond, giving them structural integrity.
The native Eskimos have 7 different words for snow. Sugar snow is not fit for making snowballs because it does not have enough moisture. This sintering step even allows for a structural change in sugar snow to set up to make a quinzee.
Place 12-inch sticks around the dome. You will need about 24-36 guide sticks. Leave about 2 inches of stick up. Your mound will look kind of like a porcupine.
Burrow into the snow on the side of the dome. Ideally, you make an entry tunnel so that you head down into your quinzhee. Think of it as a mudroom before entering the house.
Your tunnel serves as a cold air sink to trap warm air inside. Remove your backpacks and tarp. Pack down the ground and excavate the snow inside until you reach every stick. This ensures the uniform thickness of the dome.
You will notice a change in the outside light (if it is still daylight). Clear out more carefully so your walls stay thick. Ideally, the walls should be 10 inches thick.
Gently and carefully make a fist-size air hole on the top of the roof for ventilation. You may want to carve out a small, high shelf to sit some tea candles on to add light. More importantly, the tea candles can add some heat. Be sure to blow them out before you go to sleep.
Quinzhees take time to build. The 90 minute wait time to let the mound of snow set is crucial. Since most snow climates indicate shorter days you need to pace yourselves when building this structure.
If you live in a northern climate you may want to practice building one in your backyard before you set out to do so in the wilderness. All snow shelters eventually melt or collapse.
Poor snow conditions, warm weather, construction problems like hitting a support wall or people climbing on the walls, can all cause damage. Packed snow is heavy and a collapse can cause a danger to any occupants in a snow structure, igloo, or ice cave.
3. A LEAN-To

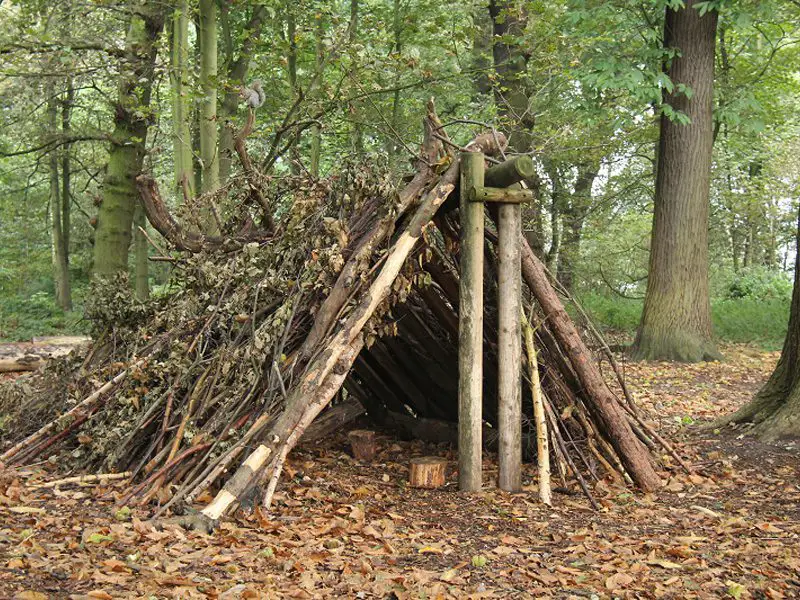
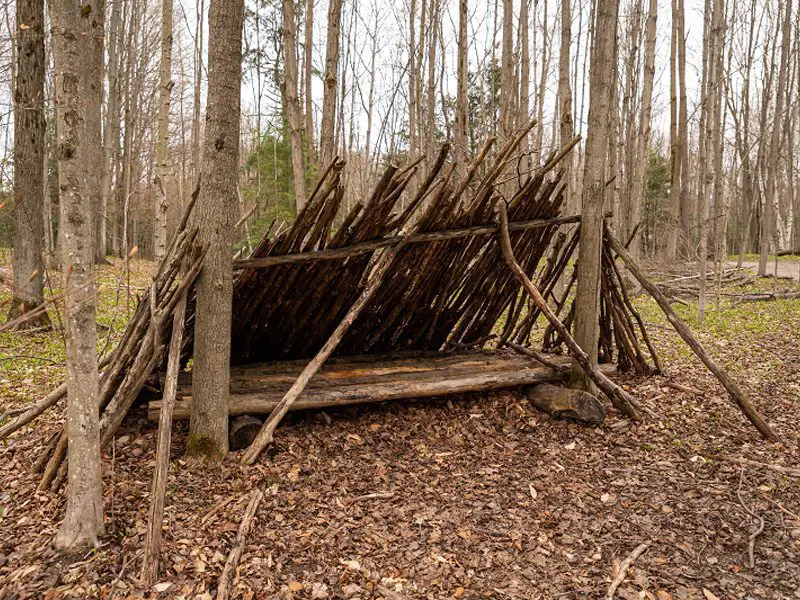
One of the easiest shelters to build is called a lean-to. It is one of the most frequently primitive constructed shelters.
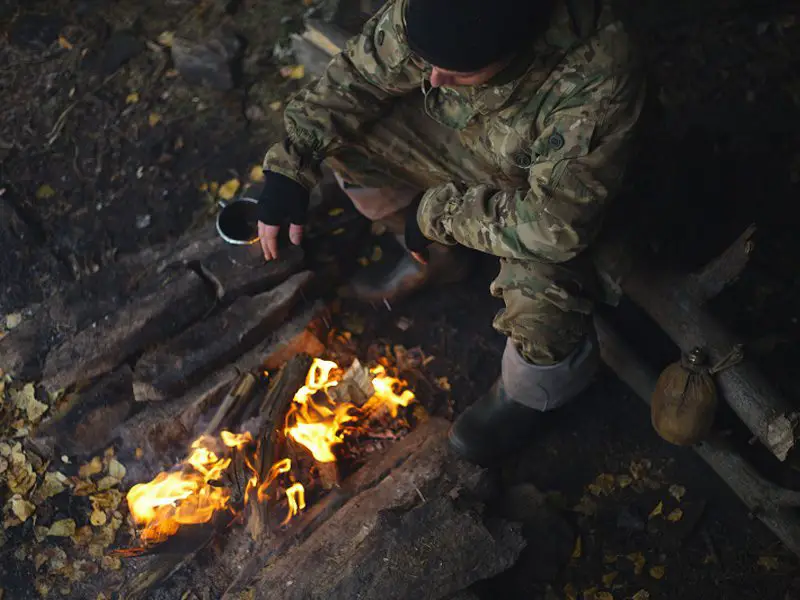
It can be set up rather quickly, in less than an hour, using a basic design to protect against wind and rain. If you add a small fire you can increase the heat as well.
Pick a dry, flat place near two sturdy trees wide enough to lie down. Obviously, if you are out with other people the lean-to needs to be bigger. Don’t choose a place under cliffs with falling rocks.
Securely lash a strong pole between the two trees using the Y joint on each tree.
Carrying around some nylon paracords for tying and securing poles to trunks is a big help. Learn the art of knot tying and/or bring along some plastic long zip ties. Please take your zip ties out of the wilderness when you leave.
Cover one side with poles and then cover the poles with a brush, palm fronds, long grasses, or anything else that is available. Think of this as a house with only one wall and half a roof.
You can use a tarp, emergency blanket, or poncho instead of foliage or in addition to the foliage. This will help protect you better against wind and rain.
Improvising with what’s around is the key. Your roof cover may need to be dense if you are dealing with rain. You can cover the other side with poles for a two-sided shelter in the shape of a triangle with the ground as the bottom.
If the ground is wet you can lash some sticks together and place them on two thicker stickers forming a little platform. Use the mud around you and put it on the stick platform.
The mud will keep the wood from burning. Make the fire on top of the mud, possibly using a sheet of aluminum foil to keep the wood dry enough to light.
4. Tarp Shelters
With some foresight, you can have a shelter with you while enjoying the outdoors. Keep some paracord, a lightweight tarp, or an emergency blanket with a waterproof side and a knife in your backpack.
You can tie a paracord between two trees and drape a waterproof tarp evenly over the rope. Let it fall like a drape.
The two trees need to be as far apart enough to cover the width of the tarp. Many tarps come with grommets on the corners to help tie them down. You can secure the four sides down by tying the corners to heavy rocks or logs.
The tarp can be one step up from the lean-to in that it is lightweight and portable. In both cases you will need a fire for heat and if the wind changes you may have to redirect your shelter.
Tarps should be ultra-lightweight, waterproof, and heavy-duty. They are good for rain as long as the wind is not too strong.
5. Emergency Survival Tarp/Tube Tent
- ⛺ Survival Shack Tent: To all adventurers, SharpSurvival...
- ✨ Waterproof Mylar Material: Crafted from high-quality...
- 🔥 Heat Reflective for Warmth: The advanced Mylar thermal...
These are one step up from the tarp shelter in that they are three-sided portable tube tents that need to be hung between two trees. The mylar material conserves heat. Mylar was invented by NASA.
That being said, they may be too flimsy a material to stand up to a real test. It may be best as an added protection for a tarp shelter. At $9.99 it may be worth it just to keep in your car emergency kit.
6. Emergency Survival Tent
- 🥡【82"*36"*31.5"】One-Piece Triangle shelter, Large...
- 💼【5.1"Φ*9.8" 1.57lb】Black Non-woven Bag with Zipper,...
- 🚨【Waterproof Windproof & Fireproof】Fire Prevention By...
Something like his 1.57-pound survival tent is one step up from the survival tarp and maybe worth packing around. It is an actual tent that is tied between two trees. It is under $25 and has added plastic protection for waterproof and strength.
Unlike the tarp, it is closed at both ends. This will provide better protection from wind and rain, but is heavier to carry.
You can set up a microenvironment to protect yourself against cold, wind, and rain. The interior reflects 90% of your body heat to keep you warm.
7. Emergency Blankets
- EXTREME WEATHER PROTECTION - Our Oceas Emergency Blankets...
- SUPERIOR QUALITY - Our emergency blankets are made with...
- UNMATCHED DURABILITY - Our emergency blankets are made with...
Although not a survival shelter, something that can add to your survival is a good emergency survival blanket. They are usually made of mylar and many have a waterproof coating on them.
They are used to reduce heat loss in a person’s body. The heat your body produces is usually dispersed into the environment. When you are wrapped in a mylar blanket the heat is reflected back to you.
Survival blankets are reusable. You wrap the blanket with the silver side towards you.
Wrapping a patient in a survival blanket can save a life. It is important to keep trauma victims warm so they do not go into shock or hypothermia.
8. Survival Sleeping Bag
- ME CONDITIONS—Originally designed by NASA for space...
- STAY WARM AND ALIVE IN EXTREME CONDITIONS—Originally...
- EMERGENCY USE AND EXTRA-THICK TEAR—Delmera Emergency...
There are sleeping bags that can also help in a survival situation. They are halfway between a mylar sheet and a wool blanket.
They are lightweight (4.6 oz) and the temperature rating is between -5 to -20 Ferinhiet. They are waterproof and not easy to tear. The mylar reflects the body heat back to warm the person.
9. Shelter in the Desert
In the desert, you may need shelter against the sun during the day and a place to rest during the cold nights.
The heat makes you sweat and lose water. To build a desert shelter you need a shovel, sand, and a tarp, poncho, or mylar blanket.
First, you need to dig a trench with your shovel, 15-24 inches deep that you can comfortably lie in. Locate the trench between sand dunes and rocks. Secondly, place the sand you unearthed around three sides of the trench.
Remove additional sand from the foot side of the trench so you can get in and out easily.
Cover yourself with a poncho or tarp, placing a few rocks (or sand) around the sides on top so the wind does not blow the tarp away. Many animals survive the desert by spending their day underground or in the shade.
Why might you need a survival shelter?

Extreme climate conditions can be dangerous. Exhaustion or dehydration, lack of sleep, or a safe place to rest can affect your mental health as well as your physical health.
Building a shelter can be more important than food and water. A shelter does not need to be fancy, it just needs to keep you warm, dry, and protected. Hypothermia can set in quicker than you think.
What is hypothermia?
Hypothermia is caused by prolonged exposure to a cold temperature that creates a situation where you are losing heat quicker than your body is producing it.
Lengthy exposure to cold can use up your body’s stored energy and cause your body temperature to drop.
Normal body temperature is 98.6 degrees F (37 degrees C). Hypothermia occurs when the body temperature drops below 95 degrees F (35 degrees C).
When your body temperature drops, your organs can’t work normally and efficiently. Hypothermia, left untreated, can lead to heart failure. It is often caused by exposure to cold weather or immersion in cold water.
People who have hypothermia often do not realize they have it. The symptoms come on gradually.
Sometimes, when hiking with a group, the less fit hikers try to keep up with the more fit hikers, which causes fatigue. Adverse weather can accelerate heat loss, especially if the participants have become wet.
Once the exerciser becomes too tired to walk in cold, wet, windy weather, either because they already have some of the first stages of hypothermia or because they are exhausted, a worse situation can only be avoided if a survival shelter is built to protect them from the wind and rain.
According to the British Journal of Sports Medicine article “Physiology of accidental hypothermia in the mountain; a forgotten story” by PN Ainslie and T Reilly, “Competitiveness may keep the walker from admitting his or her condition, and he or she may reach a severe state of exhaustion or wetness before calling for a rest stop”.
The symptoms of hypothermia, according to the Mayo Clinic, include:
- Shivering (a good sign that the person’s temperature regulation is working)
- Slurred speech or mumbling
- Slow, shallow breathing
- Weak pulse
- Clumsiness or lack of coordination
- Drowsiness or low energy
- Confusion or memory loss
- Paradoxical undressing (the confused person removes clothing)
- Loss of consciousness
- Bright red color (in infants)
How to Treat Someone with Hypothermia
If someone has fallen into the water and is saved, remove the wet clothing and warm him with dry clothes.
Treat him gently, do not massage or rub the person excessively. Contrary to what you might think, vigorous movement can trigger cardiac arrest. You do not want to overstress the person’s heart and lungs.
If the person is conscious, try to give him a warm drink. Do not give him alcohol to drink. A little shot in this situation can harm someone, rather, a warm, sugary drink that is free of caffeine is required. Do not give an unconscious person anything to drink.
Wool shirts provide more heat when wet than synthetics. Wrap him or her in a space blanket if available or in a in a dry sleeping bag. Have a non-hyperthermic person in light, dry clothing get into the sleeping bag with the hypothermic patient.
Some recommend skin-to-skin contact. They will thank you later, this is not a time to be embarrassed.
Infants lose body temperature more easily than adults. They do not shiver. Kangaroo them in someone’s shirt and jacket after removing any wet clothing.
If someone’s body temperature drops below 95 degrees F (35 degrees C) for a prolonged period of time, they can die within an hour.
The person gets sleepier and sleepier and eventually falls into a coma. On the other hand, you do not want to warm up a person with hypothermia too quickly.
Do not attempt to warm the hypothermic person’s arms or legs. Think heating from the core out, not from the outside in.
In very rare situations, a severely hypothermic person presents with no pulse and does not seem to be alive. According to the CDC (Center for Disease Control and Prevention), a person with severe hypothermia may not have a pulse or be breathing.
Feel for a pulse for a whole minute before giving CPR because the heart rate can be extremely slow and you should not start CPR on anyone who actually has a heartbeat.
If there is no pulse, give CPR. In this case, give CPR while keeping the person warm, as you may be able to resuscitate them.
Survival and Wild Animals
A tent can not protect you from wild animals but there are some things you can do to limit your vulnerability. Insects and snakes can’t get into a sealed tent so make sure you repair any ears and zip up when you are not using it.
Some things you can do to avoid encounters with wild animals are:
- Do not eat in your tent
- Make noise, animals don’t want to interact with humans
- Don’t wear headphones and pay attention to what’s around you.
- Don’t sleep in clothes you have cooked in. The smell can attract critters.
- Keep food far away from the campsite, preferably tied up in a tree.
- Keep children and pets close
- Avoid hiking at dusk or dawn when more animals are out.
- Back away slowly, do not run as you may be seen as prey.
- Avoid looking directly into a bear or cougar’s eyes, it is a signal for attack.
- Carry pepper spray and know how to use it
- Don’t eat smelly food like fish around the campsite.
- Bears and cougars can run way faster than you.
- If you see an animal and it has not seen you back away slowly and detour quietly so it continues to not notice you
- Steer clear of a mama and her young.
- Don’t feed any animals in the wild, it’s not good for them and can be dangerous for you
- Don’t get too close to animals in the wild, you are in their territory
Conclusion
We live in a time where our basic needs are easily accessible. Water from the tap, turn on a light switch and we have light, our stove takes a few seconds to light.
However, if you are out in the wild you need the knowledge to acquire basic needs. Building a shelter is an important skill for any survivor.


