SHTFPreparedness may collect a share of sales or other compensation from the links on this page.
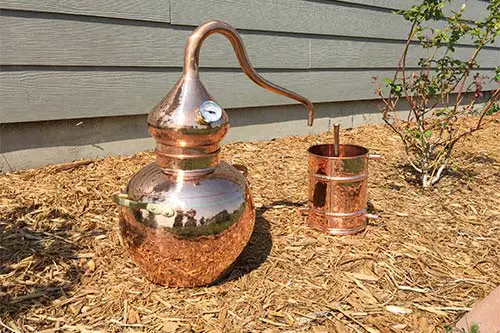
I would like to start by giving a huge shout out to whiskeystill.net for hooking me up with a 2.5 gallon whiskey still. I really have had fun with it. Actually, I still am 🙂

Beautiful and elegant
Whiskey Still Kits
Any still you buy from whiskeystill.net comes with a 90 day, 100% cash-back guarantee! Also if you are short on cash to buy one, they offer payments through PayPal which is very handy!
You are not just limited to making moonshine with these stills either, you can make Whiskey, Scotch, Rum, Bourbon, Cognac, Schnapps, Tequila, and vodka.

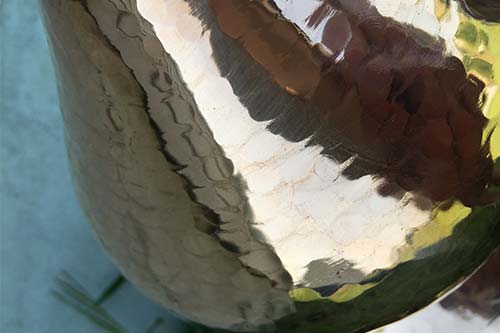
Look at the craftsmanship of the vessel.
These still kits from whiskeystill.net are all beautiful and decorative, as noted by other reviewers. Beyond that, the function of these units is nothing short of phenomenal after setup and the recommended test runs.
Like a lot of beginners, I began by simply converting store-bought white wines into very delicious and potent brandies. However, once the brewing bug bit, I ventured into more homemade concoctions.
In my region, there is no shortage of corn available. I have come up with a very simple method to make corn whiskey moonshine.
Feel free to try it for yourself and flavor/age/refine it to your own specific tastes (of course abiding by all distillation and brewing laws in your area).
Basic Required Equipment
You will need a large pot for making your mash and mixing spoons. Additionally, a brewer’s thermometer, cheesecloth or a fine colander for straining, a plastic funnel and two sanitized 5-gallon buckets for aerating.
A test tube and hydrometer is also needed to determine the alcohol content of your whiskey.
For the fermentation process, you will also need a vessel of adequate size. My recommendation is a 6.5-gallon glass carboy. However, you can get away with using a water cooler jug with a homemade airlock.
There are various brewing kits available online or in wine and beer shops, these are just the basic elements.

Corn Whiskey Moonshine
Ingredients
- 8.5 pounds of crushed corn (a.k.a. flaked maize)
- 1.5 pounds of crushed MALTED barley
- 5 gallons of water
- 2 packets Fleischmann’s Active Dry bread yeast
- 1 TSP sugar
Instructions
- Heat the water to about 170°F and then turn off the heat.
- Add the crushed corn to the water and stir for 3-5 minutes.
- Then decrease stirring to 5-10 seconds about every 5 minutes. (1)
- As you stir, keep monitoring the temperature of your mash mix. Once the temperature drops to 152°F, add the malted barley.
- Stir for 1-2 minutes until mixed well.
- Cover the mixture and let rest for 90 minutes. (2)
- In the meantime, heat ½ cup of water to 110°F.
- In a jar or glass, add the 2 packets of active dry bread yeast and the sugar to the water. (3)
- After the rest period of 90 minutes, allow the mash to cool to approximately 70°F, the optimal temperature for adding the yeast. (4)
- Pour the mash through your cheesecloth, or fine strainer, into a clean bucket to separate the solids. (5)
- Once separated, pour the liquid mash between the two clean buckets about 15 times to aerate. (6)
- Measure the specific gravity using a hydrometer. (7)
- Add the yeast starter to the mash and give it a good stir.
- Transfer the mash to your fermentation container.
- Seal the container with an airlock and leave it to sit for at least 7-10 days. (8)
Notes
Preparation
(1) Note the corn will thicken into a doughy gel as it is stirred, which is as expected. Essentially, the corn is breaking down and releasing starch into the water. This starch will eventually ferment to become sugars, which later will become the alcohol you are ultimately producing. The mixture will thin out quite a bit once barley is added and you begin mashing.
(2) During this resting period, the malted barley will begin converting the corn starches into sugar. It is the enzymes within malted grains that allow this conversion to take place, hence, why it is essential to use malted barley for this method. Later, during the fermentation process, the yeast will then convert these sugars into alcohol.
(3) This step will allow you to confirm that your yeast is good by the formation of an expanding “yeast cake” on top of the water. Once added to your mash mixture, this yeast will be ready to immediately begin the fermentation process.
(4) It is recommended to cool the mixture as quickly as possible to decrease the possibility that bacteria will contaminate the mash. The best way to do this is by using an immersion chiller. However, you can simply let it sit for a few hours.
(5) My favorite method to separate out the solids is to use cheesecloth and scoop out a little mash at a time. Then, simply squeeze it for all you’re worth to get the most liquid possible out of the mix. More liquid means less waste.
Aeration
(6) Aerating your mash is a critical step as the yeast will need oxygen to survive and fulfill their appointed task in your mixture. As you pour, bubbling and frothing is a telltale sign that you’re aerating properly.
(7) Taking the specific gravity will provide the measurement of starting alcohol. Typically, another reading is taken after fermentation and those numbers are used to calculate how much alcohol is in the wash.
Fermentation
(8) Fermentation is the final step of the mash making process. A good rule of thumb to follow is if the mixture is bubbling, it is still fermenting, and you should leave it to sit for the best results. Be patient as this may in some cases take up to 2-3 weeks.
Conclusion
Now you’ve got a simple mash. It will be very easy to turn it into your very own high-proof moonshine from here with your 2.5-gallon still!