SHTFPreparedness may collect a share of sales or other compensation from the links on this page.
If you’re a new prepper or survivalist who’s just getting started, you’re overwhelmed.
We get it: There are literally millions of different DIY projects and pieces of gear to buy and craft into your survival kit. This is your launchpad for the top DIY survival gear you should make first.

Before we dive into each project, here’s a checklist of the four basic things you need as a new prepper. Our goal is to satisfy these categories with our homemade survival gear:
- Make fire
- Sanitize water
- Create an effective shelter
- Source and cook food
DIY Fire Starters
Fire, and the heat it provides, is the absolute first thing any good prepper must know how to make from scratch. Fire cooks food and cauterizes wounds, sanitizes water better than any chemical, and it provides heat.
But DIY fire starters mean no fancy magnesium on your keychain. Lucky for you, things are sitting around you right now that you can use:
DIY Battery/Steel Wool Fire Starter

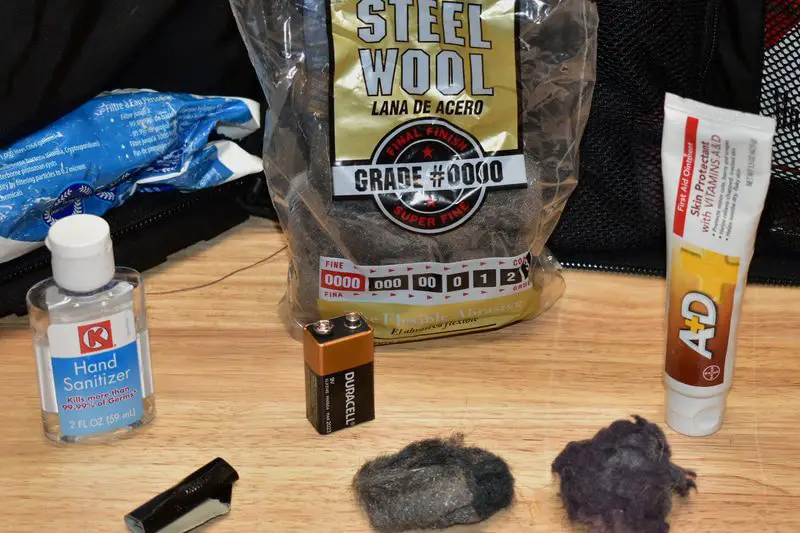
An invaluable combination, this is the DIY igniter to make. Invest in these two cheap and universally useful items before anything else.
Items Needed:
- Steel wool
- 9-volt battery
How to Make a Battery Fire Starter
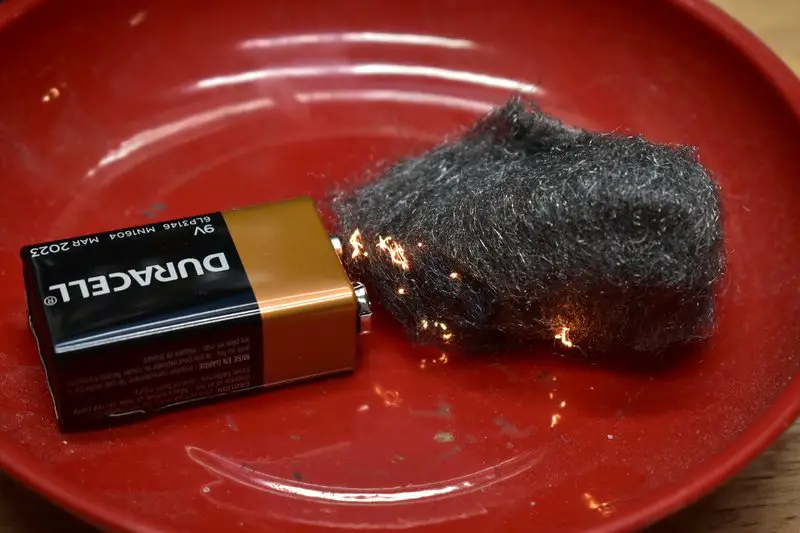
Simply place the battery’s (-) and (+) leads on the steel wool, which should catch fire immediately. Use caution as steel wool is a highly effective ignition source.
Petroleum Jelly/Cotton Ball Fire Starter
A simple fire starter made from items that the typical person has lying around the house.
Items Needed:
- Petroleum jelly
- Cotton balls
How to Make Cotton Ball Fire Starter
Grab some petroleum jelly from the bathroom cabinet and dunk a few cotton balls in it to soak ‘em.
Store them in a sealed plastic bag, and you’ve got some reliable all-weather, waterproof fire-starters that’ll burn slow and hot. Petroleum jelly is made from crude fossil fuels, after all.
Hand Sanitizer Fire Starter
You’ve probably got some lying around due to the coronavirus. If not, learn how to make your own hand sanitizer.
Some unscrupulous resellers have begun marketing low-alcohol-content sanitizers. You need a gel that is at least 60% alcohol to make an effective fire-starter (though you will want a higher % for actual hand sanitizer).
Items Needed:
- 60%+ ethyl alcohol hand sanitizer gel
How to Make a Hand Sanitizer Fire Starter
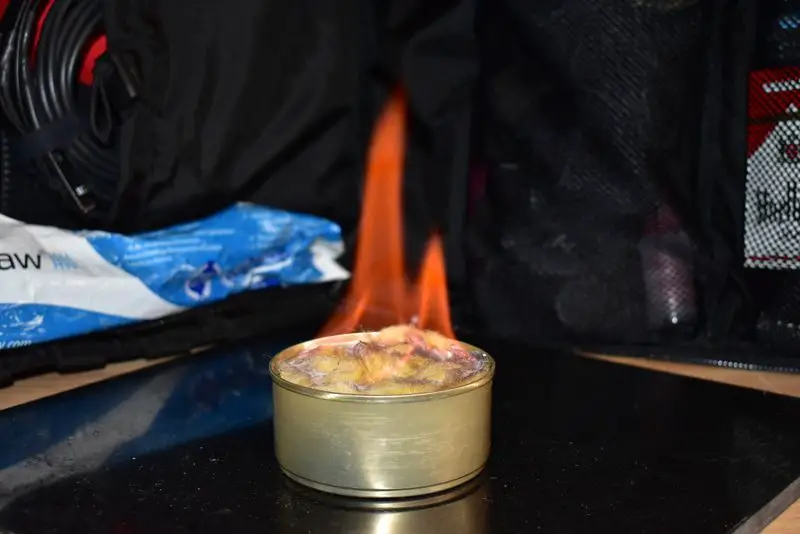
Just cover a slow-burning material like wood with hand sanitizer and light. Hand sanitizer is supremely flammable, and its gel-like mixture allows it to coat material and burn with a very hot, blue flame.
Ball of Duct Tape Fire Starter
Duct tape will melt into a gel and burn slow and hot for quite a while, even in the wind.
Items Needed:
- Duct Tape
How to Make a Ball of Duct Tape Fire Starter
We keep it simple, folks. Wad up a ball of duct tape to create a highly flammable fire-starter. Mind the fumes.
Homemade Thermite
Items Needed:
- Uncoated aluminum (like kitchen foil)
- Rusty iron tool or pipe
- Sandpaper or file
This one’s for when you’re desperate: When you absolutely must make a big fire in the soaking wet or cold in a hurry, mix up some rough thermite. It’s surprisingly easy.
How to Make Thermite
Find any uncoated aluminum you have lying around (kitchen foil works) and sand or file it to make aluminum powder. Find any rusty iron tool or pipe, and repeat. The finer you can get the powder, the easier and faster it will be to ignite.
Mix three parts powdered iron rust to one part aluminum powder and sift it into a fine mixture.
You’ve just made a weapons-grade ignition material that can start a fire underwater and melt alloys at more than 4,000 degrees (F). This one can be used creatively, and we’ll leave it at that.
WARNING: Thermite is extremely volatile and dangerous and should only be used when absolutely necessary, with precaution. Do not ever attempt to ignite this material up close or without protection or cover. Do not look directly at the flame, or it will blind you. Seriously.
DIY Survival Water Filters
Making potable water comes right along with DIY fire starting. You can simply boil your water to sanitize it, but there are more effective ways to make water safe and enjoyable to drink (you know, by removing all those critters and debris).
DIY Bio-Water Filter
The best-improvised water filter is one that sanitizes and removes contaminants. You’ve probably seen those $500 under-the-sink kits for your home. But making a DIY bio-filtration system is surprisingly easy.
Items Needed:
- Aquarium sand
- Aquarium gravel
- Charcoal aquarium filters
How to Make a DIY Charcoal Bio-Water Filter
Yes, you’re basically building a fish tank filled with rocks to drink from. Makes sense, right?
Grab a 2-liter bottle or milk jug and clean it out. Cut the top of the bottle off, making a hole just large enough to dump your filter media inside.
First, layer the bottom of the container with activated charcoal packets. It’s best to leave the aquarium charcoal in the cloth fabric. The entire bottom of the container should be covered with 1” of charcoal.
Then layer at least 2” of sand atop the charcoal filters.
Finally, fill the rest of the container with gravel. Poke small holes in the bottom of the container, just large enough to allow water droplets through.
Voila, you’ve got a pour/drip DIY bio-water filter. You can let the water collect in any container beneath the filter for storage or drinking.
DIY Water Distiller
Distillation can produce 100% pure drinking water from actual mud if you’re good enough.
To distill water, it must be boiled. The water vapor is collected and condensates back into liquid water, purified for drinking.
Making a DIY distiller started just about anywhere is easy enough, because of our fire-starters. A simple open flame can be used, but you should try to use a DIY stovetop. We’ll cover that in the next section.
You’ll need a few things from around the house. If you don’t have all this stuff, the local hardware store will have everything else you need.
Items Needed:
- Pressure cooker or tea kettle
- Threaded adapter (if using kettle)
- Stove or reliable heat source
- 2-ft. high-temp silicone tubing
- Sanitized plastic container
How to Make a Water Distiller
The pressure cooker or tea kettle will be used to boil your water. The pass-through hole in the center of the cooker’s lid (or the tea kettle) is where purified water vapor will collect.
A tea kettle will require a threaded adapter to secure the tubing. The pressure cooker’s relief valve can simply accept the appropriately sized tubing with no adapter.
The longer the tubing, the better the water vapor can cool and condense back into a liquid. Copper tubing can be used, too. It’s even more effective at cooling vapor.
Allow the tubing to fall below the height of the cooker or kettle so gravity can collect the recondensed water in your plastic container.
DIY Survival Shelter
DIY Poncho Tent
There is only one improvised shelter worth creating, and it’s the poncho tent. Made famous by militaries for decades, this DIY survival kit turns your all-weather cover into a reliable and waterproof tent. The most important aspect of this project is getting the right poncho in the first place.
Items Needed:
- Waterproof poncho
- String or Paracord
- Hiking pole or stick
You want a poncho measuring at least 80” x 50”, or about the size of a Full/Double comforter. Any smaller and you won’t have enough coverage to lay and sleep.
This waterproof poncho is a perfect candidate. It’s made from waterproof ripstop fabric with a PVC coating. But most importantly, it has metal eye loops around the edges for fastening it into a tent, and a cinched enclosure for sealing the hood up.
You’ll also need some 550 paracord. Get at least 100 feet of the stuff.
Finally, any hiking poles or sticks from the brush will do for propping up the center of the tent.
How to Make a DIY Poncho Tent
- Fasten each corner of the poncho with string or cord.
- Secure all four corners of the poncho so it’s stretched flat, without any slack.
- You want the edges of the tent 24” to 36” off the ground when tied down.
- Raise the center of the poncho by propping it up with a pole or stick.
This tent relies on tension to stay propped up. Paracord works best for this. It has just a bit of stretch, but it’s tough and won’t loosen when soaked.
DIY Survival Gear to Source Food
You gotta find some food before you can cook it. You’ll probably have to catch and kill that food, and that means coming up with more tools.
One of the easiest ways to source good food without wasting too much energy is fishing. We’re going to cover how to make a basic but reliable fishing rod.
DIY Fishing Kit
Fishing is one of the easiest ways to collect food in a wilderness survival situation. Most of the continental U.S. is ripe with lakes, streams, and small waterways, even in the southwest. Making a DIY fishing rod or kit is also one of the easiest projects for preppers.
Items Needed:
- 3- to 6-ft. PVC pipe or broom handle
- Duct tape or wood screw eyelets
- Fishing line or Paracord
- Safety pins or soda tabs
How to Make a DIY Fishing Kit
PVC or a broom handle works well as improvised fishing rods because they have some flex and bounce. Using a piece of metal or hardwood will make it difficult to feel when your line gets a bite.
An actual fishing line can be used, too, but splitting open a line of Paracord and pulling out one of the nylon strands works just as well. You should give yourself at least 50 feet of line to work with.
The bottom of the line can be simply wrapped around the base of the rod. It’s not fancy, but making a spool is difficult.
To secure your line along the length of the rod and the tip, 5mm or 5/32” wood screw eyelets are recommended. Simply thread them into the PVC or broom handle by hand every 8 to 12” from the base to the very tip of the rod.
Duct tape can be used in a pinch, but this will increase the chances of the line breaking. It’ll also prevent you from “unspooling” your line further for casting.
To fasten hooks, simply use open safety pins. You can also cut soda can tab loops to make small hooks. You can use pebbles or even car tire weights as improvised sinkers.
DIY Survival Stoves
Once you’ve hooked some tasty critters (or found some edible flora) you’ve gotta get it prepped, sanitized, and cooked.
Sure, you can build an open fire and just throw the food next to some heat, but that’s crude, even by these standards. Making a real survival stove is super easy and makes a consistent source of heat, so your food won’t burn or wind up raw.
DIY Stove Cooker (The “Rocket Stove”)
This is the Boy Scouts’ badge of DIY cooking. A rocket stove is little more than a #10 can, two small soup cans, some insulation from the attic, and some tin snips for cutting. You’ll also want a sharpie for marking your cuts.
Wear gloves while doing this, or you will cut yourself on these razor-sharp lids. A good pair of shooting gloves is a smart investment for that next range day. They’re tough but nimble, great for crafting things.
Items Needed:
- #10 can
- 2 small soup cans
- Insulation from the attic
- Tin snips
- Sharpie
- Shooting gloves
How to Make a Rocket Stove
- Take the lid off the first soup can.
- Trace a hole on the outside of the #10 can with the soup can lid 1” from the bottom.
- Cut out the hole you traced in the #10 can with a pair of tin snips.
- Now cut the bottom out of the first soup can, to form it into a tube.
- Remove the lid from the second soup can.
- Use this lid to trace an identical hole in the soup can, 1” from the bottom.
- Cut this hole out of the second can.
- Once cut, place the second can inside the center of the #10 can.
- Insert the first soup can through the #10 can’s and second can’s holes.
At this point, the stove itself is roughly formed. You should snip and fold the excess parts of each can out the holes you cut. This will secure the cans to each other and improve airflow through the stove.
The #10 can and interior soup can should be connected horizontally by the tube we made with the third can. The negative space in between the interior and #10 cans must be packed tightly with fiberglass insulation, which you can grab from the attic or crawlspace.
Then, we need to cap the stove with the #10 can lid but first, we need to cut it open.
- Trace a hole on the lid of the #10 can using one of the soup can lids.
- Cut out the hole in the top of the #10 can’s lid.
- Ensure insulation is packed tightly into the stove.
- Cap the stove with the #10 lid.
Voila! Now, you can add twigs, charcoal, or any source of improvised fuel to cook. The insulation and interior can produce a consistent and weatherproof flame that burns slowly.
DIY Alcohol Survival Stove

Alcohol stoves can be as fancy or as simple as you’d like. We like to keep things utterly simple with our design (this one burns for quite a while, too).
After all, you’ll probably be in dire straits if you ever need to make one of these things in real survival situations.
Items Needed:
- Empty soda can
- Flammable alcohol
- Insulation from the attic
- Thumbtack or knife
How to Make a Stupid-Simple DIY Alcohol Stove
First, clean out the soda can. Fill it with fiberglass insulation. You can simply stuff it in through the soda tab opening. Pack it tightly. The fiberglass will soak in the alcohol, making a wick or glorified Zippo, really.
Poke small holes around the top of the lid. Start with just 3 holes equidistant from each other. The tab opening will produce a flame, too.
Fill the can with denatured alcohol or flammable liquor, and light it up. The vapors coming from the holes you made will catch fire, creating a nice little stove.
It’s good enough to cook a can of soup. Pure alcohol burns with no visible flame, so use caution.
This stove is reusable – just fill it back up when it dies.
Recap & Best Practices
We covered a lot of DIY projects in this article. There are plenty of options to pick from when it comes to food, fire, water, and shelter. But most of all, our best recommendation is to build and test these things out.
- Test which fire-starter, fuel, and stovetop are best for your food prep.
- Figure out how to best fasten your poncho into a tent before you’re stuck in the rain.
- If you have a free night, make a fishing rod from that old broom in the garage and try it.
Once you’ve got it all figured out, learn how to organize your DIY survival gear like a prepper.
